|
Scenery Workshop by Roger Drake
(Unless noted, photos were supplied by Susie Davis)
Sedum Trees
 Plant: Autumn Sedum, harvest after frost and let dry completely. Remove leaves from the stem, but leave flower heads.
(Photo: Georgia Gardener's Guide)
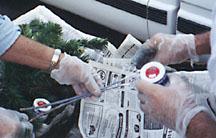
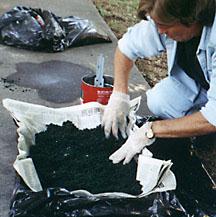
 Empty a quart can of Min-wax Wood Hardener into a large coffee can. Wear rubber gloves - you don't want this stuff on your hands. Dip the flower heads and as much of the stem as possible by tilting the can until the liquid is almost touching the rim of the can. The wood hardener is very volatile and you must work quickly to be able to finish a large number of stems. Let the stems dry - probably no more than 20 minutes.
 Use a piece of kitchen sponge to color the trunks and branches with a grey wash, 1 part acrylic grey paint to 4 parts water. Hold the stems up side down and the wash will run along the stem and go to the branches. Let the stem dry about 10 minutes.
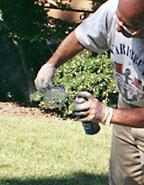 Spray the flower head and branches with aerosol spray paint, underside and topside. Choose a color of spray paint close to the color of the tinted sawdust. Refer to Dyed Sawdust section below.
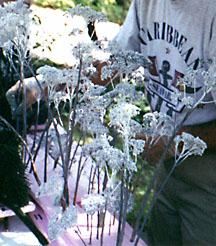
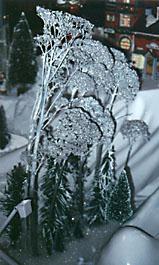
 Coat both the underside and top the flower head with sawdust. Tap the head lightly to remove any loose sawdust into the dishpan and make your next tree. Allow the stem to dry for several hours and the trees are ready to "plant." For winter trees, spray the flower head with white paint and sprinkle on glitter while the paint is wet.
Evergreen Trees
This uses an artificial Christmas tree. (I was given a discarded one.) Remove the small branches from the main branch by cutting the tape wrapping them to the main branch. At the broad end of the branch, cut off the needles nexxt to the wire to make a trunk for the new tree. If some of the needles are mis-shaped, eitgher cut off the "wild" part or pull out the whole needle from the wire.
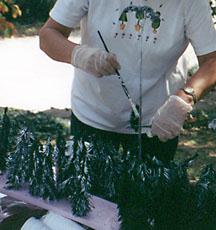
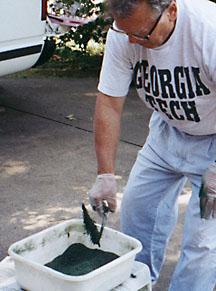 Use forceps to hold the trunk of the trees and spray painted the tree with the cheapest dark green aerosol paint. Hold the tree over a dishpan and put handfuls of dyed sawdust (see below) over the wet paint and tap the forceps to remove excess sawdust. Radio Shack has cheap forceps. They are handy for all sorts of painting. Put the trunk into a piece of Styrofoam to dry. Don't forget to use disposable rubber gloves to save on cleanup. Also, you will need to clean the forcepts with mineral spirits.
 If you want snow on the trees, lightly touch the branches with white paint. Tulip Paint also makes a glitter paint that is white to simulate snow. For Christmas lights, use Flourescent Yellow, Pink, Green, Red, "Tulip" brand fabric paint. Put small drops of fabric paint on the needles to represent lights.
Bushes and Hedges
Small bushes and trees can be made from bumpy chenille, sprayed green and coated with sawdust. A long "hedge" can be chenille also, 12 inches by 15mm in diameter, or larger if you can find it. Bend it to line your walks or borders and cut to length. You can add random flowers to it with fabric paint.
Planting Trees
You can use extruded Styrofoam insulation board for the ground. Cut to the proper size and shape, feather the edges to make them look like embankments. Paint the Styrofoam on earth brown and while it is wet, sprinkle the top with several shades of green and a little yellow sawdust. You can also use brown tinted sawdust to represent bare earth.
 For winter, paint the sawdust with white paint and sprinkle glitter on it. Use a nail to make an initial hole in the Styrofoam before pushing the stem into it. To keep the sawdust from flaking off the Styrofoam, use a pump sprayer (Windex Type) and spray diluted Acrylic Matte Medium (4 Matte Medium / 1 water) until the surface is wet. Matte Medium dries clear with no shine and is from a craft or art store.
Dyed Sawdust for use in the above techniques
The sawdust is made by using a 39 oz. coffee can or similar sized container. Fill it 3/4 full with boiling water (1/2 gallon). Add a whole package of Rit Golden Yellow Powdered dye and less than 1/2 package of Royal Blue dye. (I like the combination of Golden Yellow and Royal Blue because it gives a better shade of green.) Sprinkle the blue in and test the color with strips of newspaper. If you want a darker green, add a sprinkle of blue.
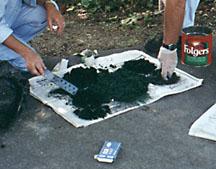 Then stir in sawdust from a lumber yard table saw until almost all the liquid is absorbed. Let it set for 5 minutes and then invert the can upside down onto layers of newspaper. Leave the coffee can inverted on the paper for a minute to let the excess water drain out. You will have to "tunk" the rim of the can several times to get all the sawdust to release onto the paper.
 Line a cardboard Coke flat with layers of newspaper and after the initial water has drained off the newspaper, transfer the sawdust to the cardboard flat and spread it out. The next day take the wet newspaper with the sawdust out of the flat and line the flat again with new newspaper and transfer the sawdust. This speeds the drying process. After the sawdust dries, sift it through a piece of window screen. Store it in food storage bags until needed.
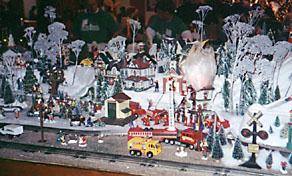
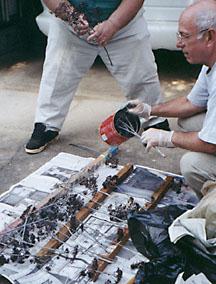
The final result...
|